Westpark Village Dental Care Blog

The Complete Guide to Prophylaxis Dental

March 2, 2026

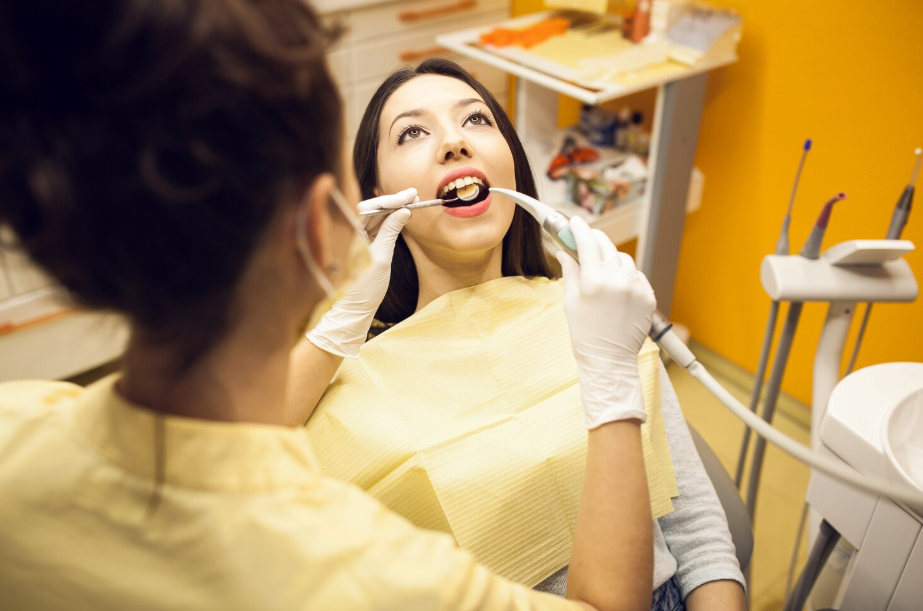
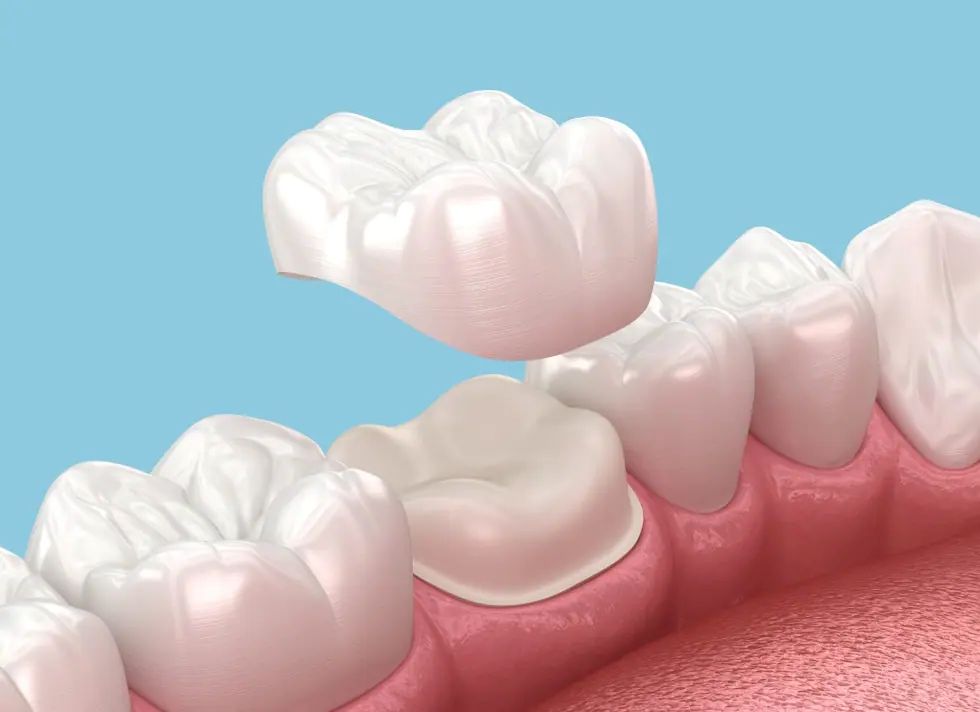
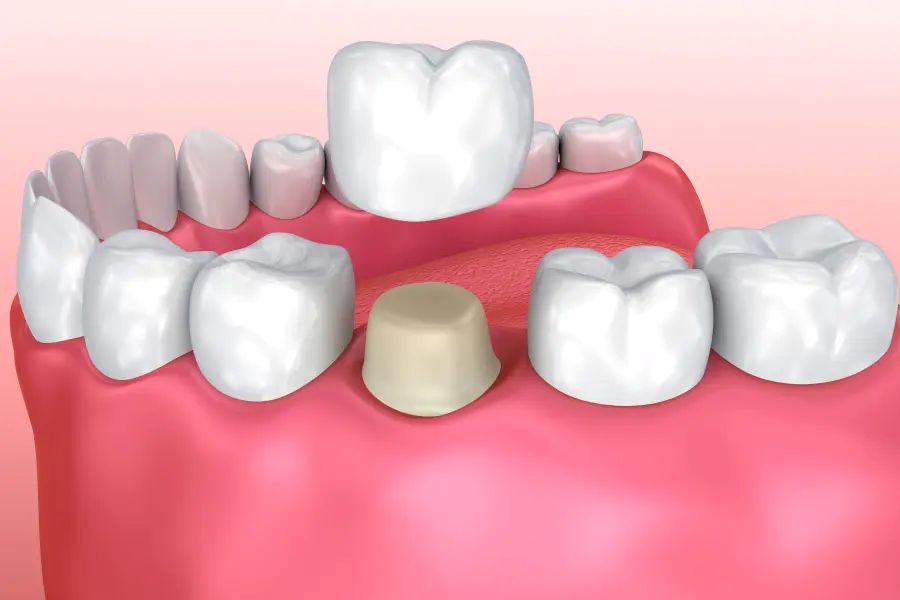
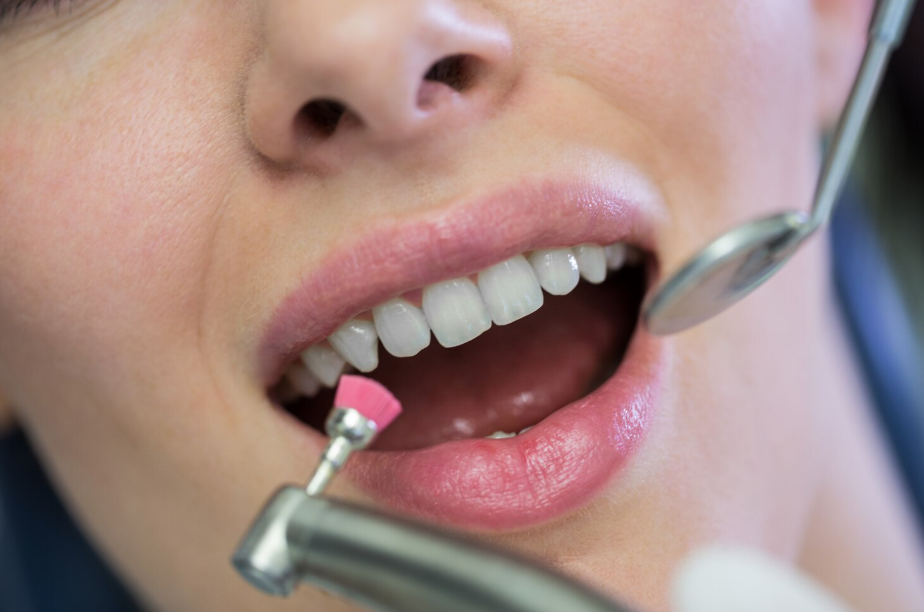
Prophylaxis dental care might sound fancy, but really, it’s just the regular cleaning and checkup stuff that keeps your mouth in decent shape. You know, getting rid of plaque, tartar, and those little stains that sneak up on you. It also gives your dentist a chance to spot problems early before they turn into something expensive or painful. 

Talking to a reliable dental services provider can make all the difference because they can point out what you’re missing at home and help you avoid bigger issues later. Brushing at the right angle, flossing every day, and keeping an eye on sugary snacks all play into it. It’s kind of like a team effort between you and your dentist.

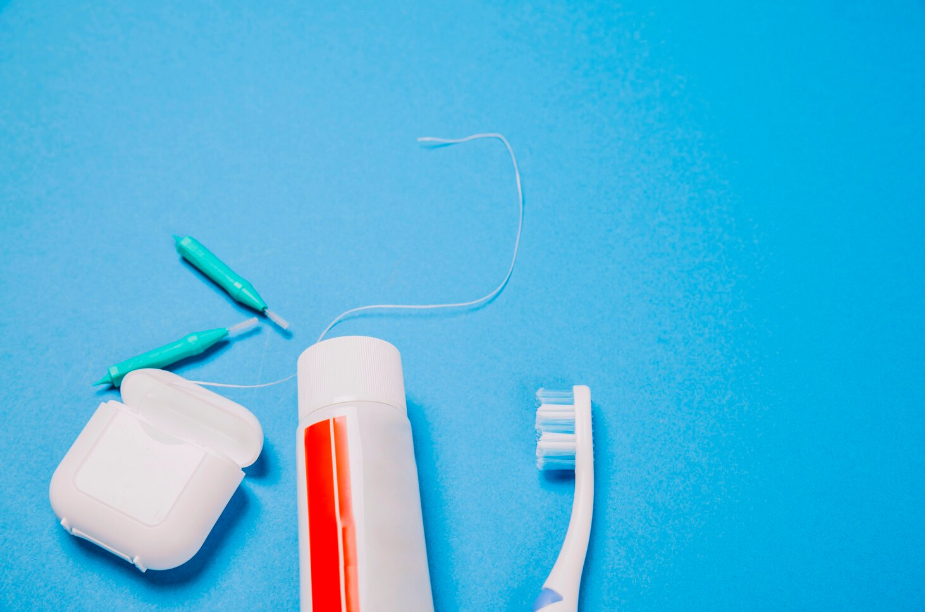
Even just small habits like using fluoride toothpaste, rinsing with mouthwash, and flossing carefully add up. You’d be surprised how a few minutes a day really protects your teeth. Prophylaxis is basically about staying ahead of problems instead of chasing them.

Importance of Prophylaxis Dental Care

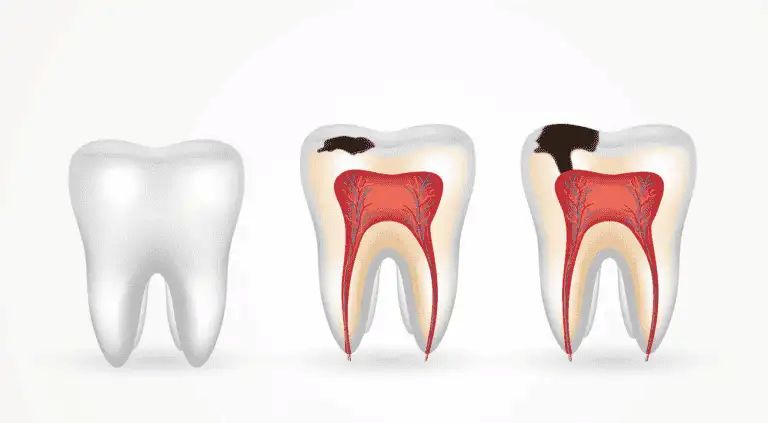
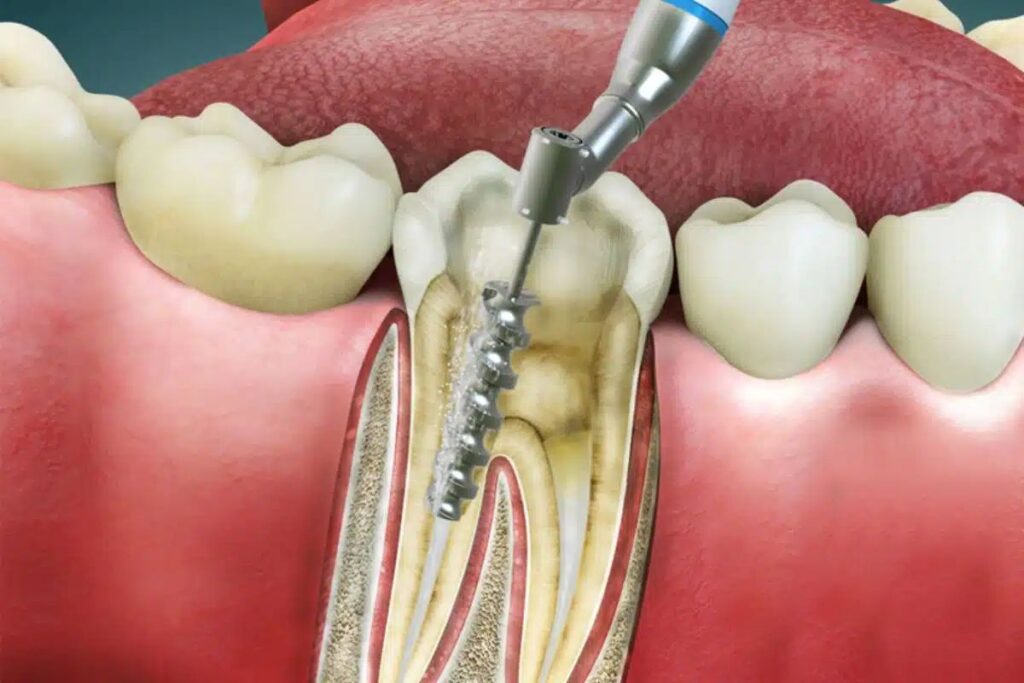
Prophylaxis isn’t just about looking good. It helps prevent cavities and gum inflammation and even keeps your breath in check. Regular cleanings remove stuff that brushing alone might miss, like tartar hiding under the gum line. It’s also a chance for your dentist to check for anything weird, cavities, or even early signs of other issues.

Your dentist can also give personalized tips during these visits, like how to floss better or whether you need a different kind of brush. Being proactive with these cleanings means you avoid bigger problems later, which saves stress and money. It’s just easier to stay consistent than fix issues after they pop up.

Benefits of Regular Dental Cleanings

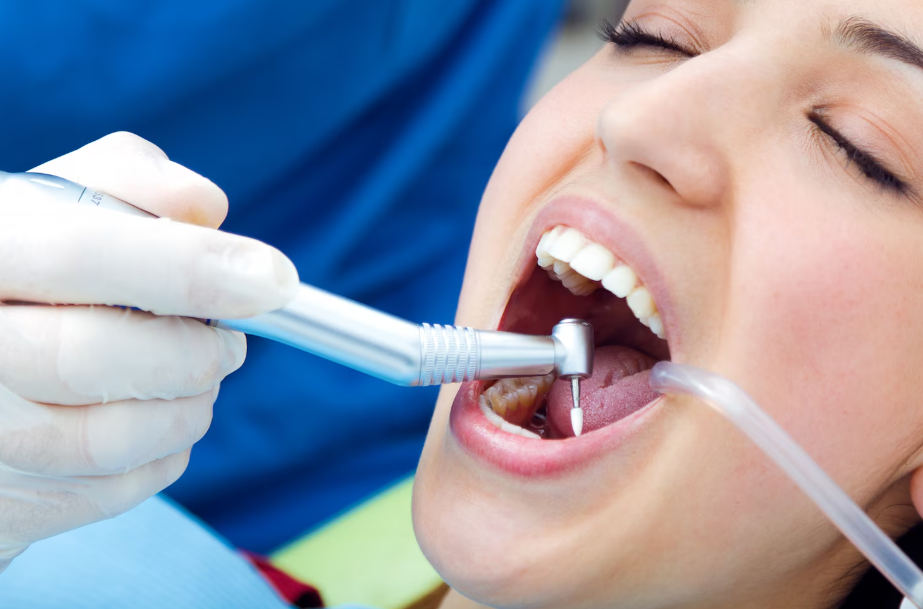
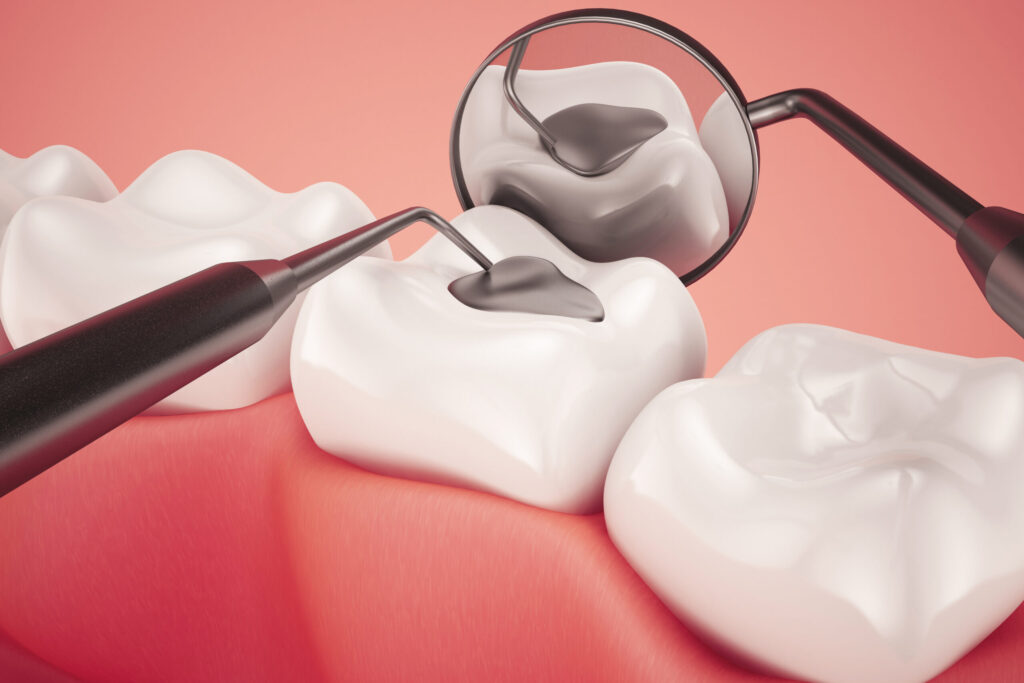
Keeping up with cleanings has perks beyond just fresh breath. It helps prevent cavities because plaque and tartar don’t get a chance to linger. It also keeps gum disease at bay since bacteria don’t accumulate as much when you’re consistent. Another bonus is that your dentist can catch problems early, like tiny cavities or enamel wear, before they become painful or expensive.

Even if you brush well at home, the cleaning removes stubborn bits you’d never get otherwise. You walk out feeling cleaner, your teeth feel smoother, and your dentist can reassure you that you’re doing things right or suggest small tweaks if not.

Proper Brushing Techniques for Oral Health

Brushing properly is more than just moving a brush around. Use a soft-bristled toothbrush with a small head to reach all the corners. Hold it at about a 45-degree angle to your gums and move in small circles. Make sure you hit every surface: outer, inner, and chewing areas.

Don’t forget the tongue; it’s a hotspot for bacteria. Two minutes, twice a day, is the magic number. And if your bristles look frayed, swap the brush out sooner rather than later. It’s not complicated, but doing it wrong just a few times a week can undo a lot of your efforts.

Effective Flossing Methods for Clean Teeth

Flossing is one of those things most people skip, but it’s super important. Using around 18 inches of floss and moving gently between teeth prevents gum irritation. You want to reach under the gum line without snapping the floss.

Some people like floss picks or even water flossers to get tricky spots. The key is consistency: floss once a day to keep gums healthy and prevent plaque buildup in places brushing alone can’t reach. It might feel tedious at first, but it pays off big time over months and years.

Tips for Maintaining a Healthy Smile

Keeping a smile healthy isn’t rocket science, though it helps to be intentional. Brush twice daily, floss every day, and rinse with mouthwash if you like. Watch sugary and acidic foods, as they can erode enamel faster than you notice. And if you smoke, quitting makes a huge difference for your teeth and gums.

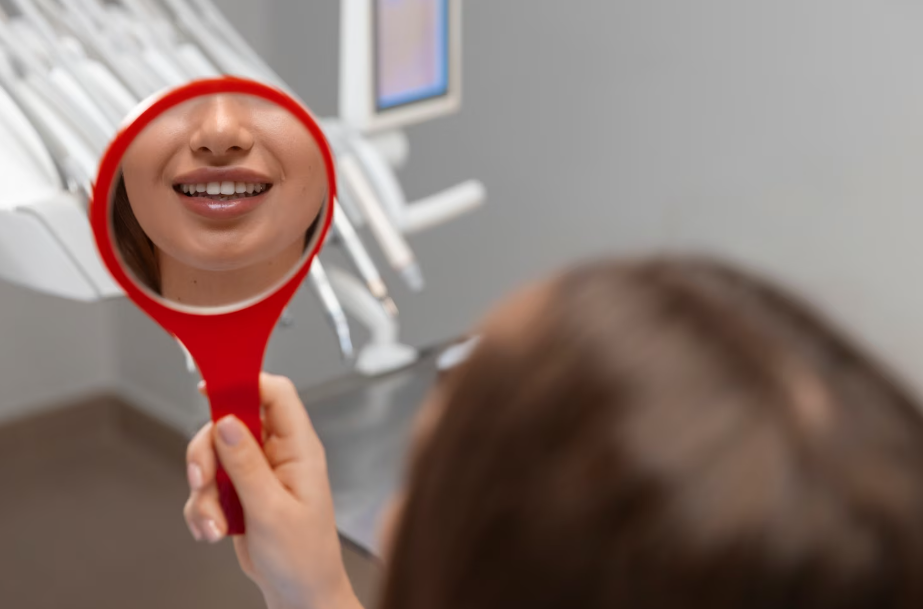
Most importantly, don’t skip your dentist appointments. Even if everything feels fine, regular cleanings and checkups every six months keep small problems from becoming huge headaches. A little care goes a long way in keeping your teeth bright and pain-free.

Preventing Plaque Buildup for Better Oral Hygiene

Plaque is sneaky and builds up fast. Brushing well, flossing, and rinsing help keep it under control. Even with good habits, some tartar is inevitable, which is why seeing your dentist regularly matters.

These routine visits remove hardened deposits and allow your dentist to guide you on better habits. Doing a bit at home every day, combined with professional cleanings, keeps your mouth in top condition. Over time, it becomes just part of life you barely notice, but your teeth definitely benefit.


Related Topics:

How Long Does a Standard Dental Cleaning Take?

A typical dental cleaning usually takes anywhere from 30 to 60 minutes. It depends on your teeth and gums that day, how much tartar has built up, and whether any extra treatments are needed. Some people breeze through a cleaning, while others spend a bit more time getting everything just right. Chatting with skilled dentists can give you a better sense of what to expect for your own appointment.

It’s interesting how much goes into it once you break it down. There’s more than just scraping and polishing; the hygienist is checking gums, teeth, and overall oral health while making sure everything is comfortable. Even if it seems like a short visit, a lot is happening behind the scenes.

Factors Affecting Cleaning Duration

A bunch of stuff decides how long a cleaning takes. If you brush and floss regularly, it’s quicker. If you’ve skipped a few days or weeks, well, it’ll take longer.

Plaque, tartar, cavities, and gum issues, they all slow things down. Deep cleanings or scaling take extra time, obviously. So don’t be surprised if your neighbor’s cleaning takes half an hour and yours stretches a bit. Everyone’s mouth is different.

Pre-Cleaning Procedures

Before the real cleaning, there’s a bit of prep. They usually check your medical history and your brushing habits and take a quick peek at your teeth and gums. Sometimes X-rays are taken if something looks weird.

Gum pocket measurements are another thing to see if there’s early gum disease. It’s not exciting, but it makes the cleaning go smoother. So, yeah, a little boring, maybe, but necessary.

Steps During the Cleaning Process

Then comes the actual cleaning. Plaque and tartar get scraped off, usually with a little vibrating tool. It tickles sometimes, so be ready.

Next, teeth are polished, then flossed to make sure nothing is hiding in the cracks. Fluoride often goes on at the end, and the hygienist might tell you a tip or two about brushing. It’s routine, but it all adds up to keeping your smile healthy.

Time Frame for Routine Cleanings

Most regular cleanings fall in that 30–60 minute range. That depends on your mouth, whether you need a little extra polish or just a normal session.

The hygienist cleans, flosses, polishes, and maybe talks about habits. Doing it regularly saves headaches later, and honestly, your teeth feel cleaner than you think.

Extended Cleaning Sessions

If gum disease or serious tartar is present, expect longer sessions. Deep cleanings can take 60–90 minutes for one section of the mouth.

The hygienist cleans above and below the gumline, which sounds intense, and it is. It’s worth the time if you want to stop problems before they get worse.

Post-Cleaning Recommendations

After cleaning, wait 30 minutes before eating so the fluoride sticks. Brush and floss gently, then carry on with your routine.

Try brushing twice a day, flossing daily, and using mouthwash. Schedule checkups every six months to catch anything early: small habits, big results.


Related Topics:

Dental Floss 101: A Comprehensive Guide on How to Use It

Getting the hang of dental floss can really change how you take care of your teeth. Picking the right type of floss and learning how to use it properly makes a noticeable difference. There’s a lot out there: nylon, PTFE, and even disposable floss picks for when you’re rushing around. And honestly, it’s not just about cleaning; it’s about avoiding gum problems, bad breath, and those annoying little nooks where food likes to hide. Talking with a trusted dental clinic in Plano, TX, can help you figure out which floss type and technique will work best for your smile.

Flossing might seem like a small thing, but it adds up. A few minutes a day keeps your gums happy and, you know, prevents bigger issues down the road. Flossing tools and some common tips can make it easier, especially if you’re starting or if your teeth are tricky to reach. Different tips and tricks suit kids, teens, and adults differently, which is neat when you think about it.

Types of Dental Floss

There are quite a few floss options out there, and each one has its perks. Nylon floss is classic, comes waxed or unwaxed, and works well for normal spacing or tighter teeth. Then there’s PTFE, sometimes called glide floss, which slides between teeth without shredding.

For folks with braces or bridges, floss threaders are a lifesaver. They get under dental work easily. Woven floss has multiple strands, giving a bigger cleaning surface. Disposable floss picks are handy if you’re on the go and need something quick. Knowing your floss type can make your routine smoother and keep your teeth cleaner.

Benefits of Flossing

Flossing is more than just a chore; it actually keeps your teeth healthy. It clears out food and plaque that your toothbrush can’t reach, which stops gum problems before they start. Gums stay healthier, and bad breath gets a lot less noticeable, too.

Over time, flossing prevents tartar buildup, which saves you from more complicated treatments down the line. Doing it regularly helps your whole mouth feel fresher, cleaner, and just better overall. It’s a few minutes a day, but it really adds up.

Proper Flossing Techniques

The trick is knowing how to actually floss properly. About 18 inches of floss works well. Wind most of it around your middle fingers and leave a little to work with. Hold it tight between your thumbs and index fingers and slide it gently between your teeth.

Curve it around each tooth in a ‘C’ shape and go just under the gum line. Make sure to clean both sides of every tooth and use a new section of floss for each space. Doing it right keeps your gums from bleeding and removes plaque more effectively.

Flossing Tools and Accessories

Flossing doesn’t have to be boring, and tools can help. Floss comes in waxed, unwaxed, tape, and even flavored types. Threaders are great if you have braces or bridges. Interdental brushes reach tight spaces that floss sometimes misses.

Water flossers use a little water pressure to get rid of leftover food, and tongue scrapers tackle bacteria on the tongue. Mixing in a tool that works for you can make flossing quicker and less frustrating.

Common Flossing Mistakes to Avoid

Some mistakes sneak in without realizing it. Using too little floss is one of them; you end up just moving bacteria around. Being rough can hurt gums.

Skipping teeth, especially the back ones, or snapping floss between teeth can cause bleeding. And rushing? That’s a biggie. Taking your time actually matters. Avoid these, and your flossing will actually do what it’s supposed to.

Flossing Tips for Different Ages

Flossing looks different depending on age. Kids often do better with picks, which are easier to handle and a little more fun. Teenagers with braces may need threaders or water flossers. Adults stick to traditional floss or brushes, and older adults might want softer floss for sensitive gums.

No matter your age, consistency is what matters most. Doing a little every day keeps teeth cleaner and gums healthier. Making it a habit early helps a lot later on.


Related Topics:

How Long Should You Wait to Eat After a Dental Cleaning?

After a dental cleaning, it’s usually a good idea to wait at least 30 minutes before eating. This little pause gives the fluoride treatment time to do its thing and really stick to your teeth. Think of it as giving your enamel a chance to soak up the protection. If you want a bit more guidance or tips on getting the most from your cleaning, a professional dental clinic can walk you through it, and you’ll probably pick up a trick or two along the way.

Some people don’t mind grabbing a snack right away, but eating too soon can undo some of the benefits. The fluoride needs just a bit of time to form that protective barrier, and that barrier is what keeps your teeth strong against cavities. Waiting a little while might seem minor, but it actually matters more than you might think.

Immediate Post-Cleaning Period

Right after your cleaning, the first 30 minutes are the critical window. This is when the fluoride is settling in, doing its job of reinforcing enamel. Eating or drinking anything other than water during this time can wash it away before it’s had a chance to work.

It’s simple, but it really helps to think of this as giving your teeth a tiny boost. The small delay makes a noticeable difference over time. Just a little patience now means fewer problems later, and that’s worth it.

First 30 Minutes

During the first half hour, avoid snacks or meals. Fluoride needs this short window to get into the enamel and strengthen it, which helps fight off decay. Skipping this step is like pouring paint on a wet surface; it just doesn’t stick as well.

If you treat your teeth kindly right after a cleaning, it pays off in the long run. Even something as simple as holding off for 30 minutes can keep your teeth happier and healthier. It’s a small habit, but it actually makes a big difference over time.

One Hour After Cleaning

Some people wonder if waiting a full hour helps. It does, especially if you want to be extra cautious. By giving fluoride that extra time, you let it bond more effectively to your teeth, creating a stronger layer of protection.

Even if you feel tempted to eat sooner, waiting can reduce the risk of cavities. Your teeth get a little more defense, which adds up over months and years. Think of it as investing in your future smile, worth the tiny bit of delay.

Two Hours Later

Two hours after a cleaning is when it becomes more flexible. By this point, the fluoride has mostly done its work. Eating anything now is usually fine, but if you stick with softer, non-sticky foods, your teeth will thank you.

This extra time also gives your mouth a chance to calm down from the cleaning itself. It’s a small thing, but keeping your routine gentle right after a cleaning helps you maintain a fresh, healthy mouth.

After Four Hours

After about four hours, you’re pretty safe to eat normally. The fluoride has had plenty of time to work, so your enamel is strengthened and protected. You can enjoy your meals without stressing about undoing your dental cleaning.

Just remember, it’s not about perfection; it’s about giving your teeth a chance to benefit fully from the cleaning. Following this timing helps your dental visits really pay off, which makes the next check-up a little less worrisome.

Long-Term Eating Guidelines

Over the long term, what you eat matters just as much as how you care for your teeth. Foods with calcium, like dairy or leafy greens, help reinforce enamel. Sugary or acidic foods, on the other hand, can wear enamel down, so it’s smart to limit those.

Drinking plenty of water and eating fibrous foods helps keep your mouth clean naturally. These little choices add up, helping your teeth stay strong and your smile bright for years. Pairing good habits with regular check-ups at a professional dental clinic really makes a difference.


Related Topics:

What Is the 2-2-2 Rule for Teeth?

The 2-2-2 rule for teeth is like a cheat sheet for keeping your mouth in check. You brush two times a day for two minutes each, and you swing by the dentist two times a year. Sounds simple. But it really works if you stick with it. And if you ever feel unsure about technique or want some tips to actually stick to it, a local dental clinic in Plano, TX, can show you the ropes.

Some people call it a way to fight “Monster Mouth,” which is basically all the gunk that sneaks in if you skip brushing or flossing. Two minutes might feel like forever when you’re in a rush, but it’s not just enough to get everywhere. Doing this consistently actually saves you headaches later, and your teeth will thank you. Even just making this tiny habit stick can make a big difference over time.

How the 2-2-2 Rule Works

The beauty of this rule lies in its simplicity. Each “2” represents a crucial part of good oral hygiene:

First 2: Twice Daily Brushing. Brush your teeth in the morning and before bed. This timing helps remove overnight bacteria buildup and clears away the day’s food particles and plaque.

Second 2: Two Minutes Each Time. Most people brush for only 30-45 seconds, but two full minutes ensures you’re giving each tooth proper attention. Consider using a timer or an electric toothbrush with a built-in timer.

Third 2: Twice-Yearly Dental Visits. Professional cleanings every six months catch problems early and remove tartar that regular brushing can’t eliminate.

Why This Rule Matters

Following the 2-2-2 rule consistently helps prevent:

  • Tooth decay and cavities
  • Gum disease
  • Bad breath
  • Expensive dental procedures down the road

Regular brushing removes plaque before it hardens into tartar, while dental visits catch small issues before they become major problems.

Making the 2-2-2 Rule Work for Your Family

Choose the Right Tools: Use a soft-bristled toothbrush and fluoride toothpaste. Electric toothbrushes can be helpful for ensuring you brush long enough.

Create a Routine: Link brushing to existing habits – right after morning coffee or as part of your bedtime routine.

Don’t Forget Flossing: While not technically part of the 2-2-2 rule, daily flossing removes plaque between teeth that brushing misses.

Make It Fun for Kids: Use colorful toothbrushes, play a favorite two-minute song, or create a reward chart to help children stick to the routine.

Common Questions About the 2-2-2 Rule

Can I brush more than twice a day? Yes, especially after eating sugary foods or drinks. Just avoid brushing immediately after consuming acidic foods – wait about 30 minutes.

What if I can’t make it to the dentist twice a year? Some people with certain conditions may need more frequent visits, while others might be fine with annual check-ups. Your dentist can recommend the best schedule for your situation.

Does the type of toothpaste matter? Any fluoride toothpaste approved by the American Dental Association will work well with the 2-2-2 rule.

The 2-2-2 rule provides a solid foundation for oral health that works for people of all ages. By sticking to this simple routine, you’re taking proactive steps to keep your smile healthy for years to come.

Contact Us

We’re here to help you achieve a healthy, confident smile. Whether you’re scheduling your first visit or have questions about our services, our friendly team is here to assist you.

Our Office: 1820 Coit Road, Suite 145, Plano, TX 75075
Call Us: (972) 964-8989
Email Us: staff@wpvdental.com
Office Hours:

  • Monday: 8:00 am – 5:00 pm
  • Tuesday: 8:00 am – 2:00 pm
  • Wednesday: 8:00 am – 5:00 pm
  • Thursday: 9:00 am – 6:00 pm
  • Friday: Closed
  • Saturday: 8:00 am – 1:00 pm
  • Sunday: Closed

Schedule your appointment easily through our online booking system.


Related Topics:

What Is a Dental Crown in Dentistry? A Clear Explanation

February 2, 2026

Dental crowns are one of the most common solutions for restoring damaged or weakened teeth. A skilled dental team can help you determine whether a crown is the right option for your situation. This post breaks down what dental crowns actually are, why dentists use them, and the different materials available. We’ll also walk through the procedure step by step and cover the benefits you can expect. Knowing how to care for your crown will help it last for years.

Definition of Dental Crown

A dental crown is basically a tooth-shaped cap that fits over a damaged or weak tooth. It restores the tooth’s shape, size, and strength while making it look better, too. Crowns are commonly used after significant decay, large fillings, or root canal treatments. These caps can be made from materials such as porcelain, metal, or a combination of both, depending on the patient’s needs. The process involves reshaping the tooth for a proper fit, taking impressions for customization, and then cementing the crown securely in place. Dental crowns play a big role in preserving both the structure and appearance of a compromised tooth.

Purpose of Dental Crowns

The main goal of a dental crown is to protect and support a weakened or damaged tooth. When a tooth is badly decayed, cracked, or structurally compromised, a crown can bring back its strength and function. Crowns are custom-made caps that cover the entire visible part of a tooth above the gum line, completely wrapping it. By fitting snugly over the tooth, crowns act as a shield, preventing further damage and protecting the underlying tooth structure. This barrier also keeps the tooth aligned properly in your mouth, so your bite and chewing function stay on point. Dental crowns help maintain oral health by protecting compromised teeth and stopping potential problems before they start.

Types of Dental Crown Materials

Dentists use several types of crown materials to fit different patient needs and preferences. The most common options include metal, porcelain-fused-to-metal, all-ceramic, and zirconia crowns. Metal crowns (such as gold or silver alloys) are durable and require less tooth removal. Porcelain-fused-to-metal crowns look natural thanks to their tooth-colored exteriors. All-ceramic crowns are popular for their great appearance, making them a solid choice for front teeth. Zirconia crowns are known for their strength and are often used on back teeth. Each material has its pros and cons, so talking to your dentist helps determine the best fit for your specific situation.

Procedure for Getting a Dental Crown

Getting a dental crown involves a few straightforward steps. The dentist starts by reshaping the tooth so the crown can fit over it properly. Then they take impressions of the tooth and the surrounding teeth to ensure the crown fits perfectly. These impressions guide the creation of your custom crown. While the permanent crown is being made, the dentist places a temporary crown to protect the prepared tooth. Once the permanent crown is ready, the temporary one comes off, and the new crown gets cemented in place. The dentist makes any needed adjustments to get the fit and bite alignment right. Regular check-ups help monitor the condition of the crown and your overall oral health.

Benefits of Dental Crowns

Dental crowns offer solid protection and support for weak or damaged teeth. They restore strength and function to teeth that have undergone severe decay or damage. By covering the entire visible portion of the tooth, crowns prevent further breakdown and potential fractures. They also maintain proper alignment and bite structure, reducing the risk of tooth shifting over time. On top of that, dental crowns can make a tooth look better, improving your smile’s appearance. With proper care, crowns can last many years, making them a durable, long-term solution for dental problems. The benefits add up to better oral health for anyone dealing with tooth restoration.

Maintenance and Care for Dental Crowns

Taking care of your dental crown helps it last longer. Follow these three guidelines to get the most out of your crown:

  • Oral Hygiene: Brush and floss regularly to prevent plaque buildup around the crown area.
  • Regular Dental Check-ups: Schedule routine visits so your dentist can check on your crown’s condition and catch any issues early.
  • Avoid Hard Foods: Stay away from biting on hard objects or foods like ice and hard candies to prevent damage or loosening.


Related Topics:

How Long Do Dental Crowns Last on Average?

Dental crowns are a common fix for damaged or weakened teeth, but they don’t last forever. How long yours lasts depends on a few key factors worth understanding before you get one. Dependable dental services can help you pick the right crown material and maintain it properly over time. This post covers factors that affect crown lifespan, warning signs to watch for, and habits that can make or break your restoration. Knowing what to expect helps you take better care of your investment.

Factors Affecting Crown Longevity

The quality of materials used to make your crown has a big impact on how long it lasts. High-quality options like porcelain fused to metal or zirconia hold up better over time compared to cheaper alternatives. The dentist’s skill in placing the crown matters, too; proper tooth prep, accurate impressions, and precise fit all play a role in how well the crown performs. Maintaining good oral hygiene habits, such as brushing, flossing, and regular dental visits, helps protect the crown and prevent problems that could cut its lifespan short. Paying attention to these factors gives your crown the best shot at lasting.

Average Lifespan of Dental Crowns

Most dental crowns last somewhere between 5 and 15 years. The exact timeline depends on the material, how well you care for your teeth, and how accurately the crown was placed. Crowns made from tougher materials like zirconia or porcelain-fused-to-metal tend to outlast those made from weaker stuff. Good brushing and flossing habits, along with regular dental checkups, can stretch that lifespan even further. Some crowns make it past 15 years, but you’ll want to keep an eye on them as they age. Catching wear early means you can address issues before they become bigger problems.

Signs of Crown Wear and Tear

Keeping tabs on your crown helps catch problems before they get worse. Here’s what to look for:

  • Fractures: Visible cracks in the crown may indicate that the material is breaking down.
  • Discoloration: Color changes, especially near the gum line, may signal that the crown is wearing down.
  • Sensitivity: If hot, cold, or sweet foods suddenly bother the crowned tooth, something might be wrong with the crown or the tooth beneath it.
  • Looseness: Any wobbling or movement means you should get it checked right away to avoid further damage.

Maintenance Tips for Longevity

Taking care of your crown doesn’t require anything complicated. Brush with a non-abrasive fluoride toothpaste and floss daily to help prevent decay under the crown. Stay away from chewing ice or using your teeth to open packages. These habits put stress on the crown and can cause damage. Go in for regular dental checkups so any issues get caught early. If you grind your teeth at night, a nightguard can protect both your natural teeth and your crowns. Stick to these basics, and you’ll get the most life out of your restoration.

Impact of Oral Habits on Crowns

Your daily habits can make or break how long your crown lasts. Here are four things to keep in mind:

  • Teeth Grinding: Grinding (also called bruxism) puts heavy pressure on crowns, which can wear them down or crack them over time.
  • Using Teeth as Tools: Opening packages or biting down on hard objects can damage the crown’s structure.
  • Eating Hard Foods: Snacking on nuts, hard candy, or ice raises the risk of chipping or breaking your crown.
  • Skipping Oral Care: Poor brushing and flossing can lead to decay around the crown’s edges, weakening the entire crown.

When to Replace Dental Crowns

Crowns are built to last, but they’re not permanent. A few signs point to the need for replacement: visible cracks, chips, or fractures in the crown; decay forming around the edges; changes in sensitivity; or a crown that doesn’t fit as well as it used to. Regular dental visits help track the condition of your crown over time. If your dentist spots any of these issues, they’ll likely recommend replacing it before things get worse. Getting a new crown when needed protects the tooth underneath and prevents more extensive dental work down the road.


Related Topics:

What Are Dental Caries? A Simple Breakdown for Patients

Most people have heard the term “cavities” but might not know what dental caries actually means. This post breaks down everything you need to know about tooth decay in simple terms. We’ll cover what causes it, how to spot it, and what your dentist can do to fix it. Excellent dental care starts with understanding the basics of how your teeth work and what threatens them. By the end of this article, you’ll have a clear picture of how to keep your smile healthy.

Definition of Dental Caries

Dental caries is just the clinical term for tooth decay or cavities. It happens when acids from bacteria break down the hard outer layer of your teeth, called enamel. This breakdown creates small holes that grow bigger over time if you don’t treat them. At first, you might not feel anything wrong. As the decay gets worse, you may notice sensitivity, pain, or dark spots on your teeth. Preventing cavities comes down to good brushing habits, regular dental visits, and cutting back on sugary foods and drinks.

Causes of Tooth Decay

Knowing what causes tooth decay helps you avoid it. The main culprit is bacteria in your mouth mixing with sugars from food and drinks. This combo produces acids that eat away at your tooth enamel. If you don’t brush and floss well, bacteria build up and raise your risk of decay. Snacking often on sugary or acidic foods speeds up the damage. Other factors include dry mouth, acid reflux, and certain medications that lower saliva production. Once you understand these causes, you can take steps to protect your teeth.

Signs and Symptoms

Catching dental caries early makes treatment easier. Watch for tooth sensitivity to hot, cold, or sweet foods. Pain when you bite down is another red flag. Dark spots or discoloration on your teeth could mean cavities are forming. Bad breath that won’t go away even after brushing might point to decay. If you notice any changes in how your teeth look or feel, schedule a dental visit. Regular checkups help catch problems before they get serious.

Diagnosing Cavities

Finding cavities early means simpler treatment and fewer complications. Dentists use several methods to spot decay. A visual exam and probing with dental tools can reveal obvious problem areas. X-rays show cavities hiding between teeth or under old fillings. Some offices use laser tools like DIAGNOdent that measure changes in tooth structure. Dentists may also apply dye solutions to make cavities stand out during exams. Getting regular checkups gives your dentist the best chance to catch decay before it spreads.

Preventive Measures

Good habits go a long way in stopping cavities before they start. Brush your teeth twice a day with fluoride toothpaste and floss daily to clear out plaque. A balanced diet with less sugar and fewer acidic foods protects your enamel. Dental checkups every six months catch any issues early so they don’t turn into bigger problems. Professional fluoride treatments and sealants add extra protection, especially in hard-to-reach spots. Using mouthwash, chewing sugar-free gum, and drinking plenty of water also help keep your mouth healthy.

Treatment Options

When cavities do happen, several treatments can fix the damage and restore your oral health. Getting treatment quickly stops the decay from spreading. Here are the most common options:

  • Fillings: The dentist removes the decayed part and fills the hole with a durable material.
  • Crowns: For larger areas of decay, a crown covers and protects the remaining tooth structure.
  • Root Canal Therapy: When decay reaches the inner pulp of the tooth, a root canal removes the infected tissue and saves the tooth.
  • Extraction: In severe cases where the tooth can’t be saved, pulling it prevents infection from spreading.

Your dentist will recommend the best option based on how far the decay has progressed and your specific situation.


Related Topics:

What Is a Dental Filling in Dentistry? A Simple Breakdown for Patients

Dental fillings are one of the most common procedures you’ll come across in dentistry. They fix damaged teeth, stop decay from spreading, and help you chew without pain. If you’ve been putting off a visit to an affordable dental clinic in Plano, understanding what fillings involve might ease some of that hesitation. This post covers the different types of fillings, signs you might need one, what happens during the procedure, and how to care for your teeth afterward. We’ll also answer some frequently asked questions at the end.

Importance of Dental Fillings

Dental fillings play a big role in keeping your mouth healthy by repairing damaged teeth and preventing decay from worsening. When a tooth has a cavity or a small crack, a filling restores its shape and lets it function normally again. Sealing off the damaged area keeps bacteria out and prevents bigger problems, such as infections or abscesses, down the line. Fillings also strengthen the tooth so you can chew and talk without issues. Regular dental checkups catch problems early, which can save you from losing a tooth entirely. Fillings help keep your teeth strong and your smile intact for years.

Types of Dental Fillings

There are several filling materials used to fix cavities and minor fractures:

  • Amalgam fillings: Durable and budget-friendly, but silver-colored and more noticeable.
  • Composite fillings: Match your natural tooth color for a seamless look.
  • Gold fillings: Known for lasting a long time and holding up well under pressure.
  • Ceramic fillings: Resist stains and work well with gum tissue.

Each type has its own strengths, making some better suited for certain situations than others. Your dentist can help you determine which option best fits your needs and budget.

Signs You Need a Filling

Sensitivity to hot or cold foods often signals that you might need a filling. Pain when you bite down, visible holes or pits in your teeth, or a persistent toothache are other common signs. Staining on the tooth surface or rough edges you can feel with your tongue can also point to a cavity. Regular dental checkups help detect these issues before they become bigger problems. Ignoring these symptoms can lead to more serious dental work later. If you notice any of these warning signs, schedule an appointment to get it checked out.

Procedure for Getting a Filling

The dentist starts by numbing the area around the tooth so you won’t feel any pain during the procedure. Here’s what happens next:

  1. Preparation: The dentist isolates the tooth using a rubber dam or cotton rolls to keep it dry.
  2. Removing Decay: A drill removes the decayed portion of the tooth.
  3. Cleaning: The area gets thoroughly cleaned to remove any leftover debris.
  4. Filling Placement: The dentist places the filling material, shapes it, and restores the tooth’s appearance and function.

The whole process usually takes less than an hour, depending on how much work the tooth needs.

Aftercare Tips for Fillings

Taking care of your fillings helps them last longer. Avoid chewing hard foods directly on the filled tooth right after the procedure to prevent damage. Brush twice a day and floss daily to keep your fillings and surrounding teeth in good shape. Regular dental checkups let your dentist monitor your fillings and catch any issues early. If you feel discomfort or sensitivity around the filled tooth, contact your dentist right away. Skip habits like nail-biting or pen chewing, as these can put extra pressure on your fillings. Following these steps helps your fillings stay strong for years.

FAQs About Dental Fillings

Here are answers to some common questions about dental fillings:

  1. How long do dental fillings last? Fillings typically last between 5 and 15 years, depending on the material and how well you maintain your oral hygiene.
  2. Are there different types of dental fillings available? Yes, fillings come in amalgam, composite resin, gold, and ceramic options.
  3. Do dental fillings hurt? Your dentist numbs the area during the procedure, so you shouldn’t feel pain. Some sensitivity afterward is normal.
  4. Can I eat normally after getting a dental filling? Wait until the numbness wears off before eating so you don’t accidentally bite your cheek or tongue.


Related Topics:

What Exactly Is Done During a Root Canal?

A root canal procedure involves removing infected dental pulp from the tooth’s interior chamber while preserving the outer tooth structure. Endodontists perform this treatment when bacteria infiltrate the tooth’s nerve tissue through cracks or deep decay. The procedure typically requires 1 to 3 visits,, depending on infection severity and the tooth’s complexity. Many people wonder what actually happens during those dental chair hours, and honestly, the process is more straightforward than most patients expect at Plano’s quality dental clinic. While the thought of root canal treatment can feel overwhelming, understanding each step helps reduce anxiety about this common dental procedure.

Step 1: Numbing and Creating Access

The dentist starts by administering a local anesthetic around the affected tooth, ensuring complete numbness in the surrounding gum tissue and jawbone. Once the area feels completely numb (usually takes about 10-15 minutes), a small access hole gets drilled through the crown of the tooth.

This opening provides direct access to the pulp chamber where the infected nerve tissue lives. A rubber dam is often placed around the tooth to keep the treatment area clean and prevent any debris from falling into your mouth during the procedure. The entire setup creates a sterile working environment, which is crucial for preventing reinfection.

Step 2: Removing the Infected Pulp

Here’s where the real work happens. Using specialized endodontic files, the dentist carefully removes all the infected pulp, nerve tissue, and blood vessels from both the main pulp chamber and the root canals. Think of it like cleaning out the inside of a straw, except these “straws” are incredibly tiny and curved.

The root canals get thoroughly cleaned and shaped with progressively larger files to remove every trace of bacteria and debris. Between each file size, the canals get flushed with antimicrobial solutions that kill any remaining bacteria hiding in microscopic spaces. This cleaning process might take 30-60 minutes, depending on how many roots your tooth has.

Step 3: Filling and Sealing the Canals

After the canals are completely clean and dry, they need to be filled to prevent future bacterial invasion. The dentist fills each canal with gutta-percha, a rubber-like biocompatible material that expands slightly to create an airtight seal. A special sealer paste gets applied alongside the gutta-percha to eliminate any tiny gaps.

The access hole in the crown is then sealed with either a temporary or a permanent filling material. For teeth with extensive damage, a temporary filling is usually placed first while a crown is fabricated in a dental lab.

Final Restoration: Protecting Your Investment

Most teeth that need root canals have already lost significant structure due to decay or fractures. That’s why dental crowns often become necessary after root canal treatment. The crown acts as a protective cap, restoring the tooth’s strength and preventing future fractures.

Some teeth with minimal damage can function fine with just a permanent filling, but your dentist will assess each case individually. The restoration choice depends on factors like remaining tooth structure, bite forces in that area, and your overall oral health.

Recovery and Aftercare Expectations

Post-treatment discomfort usually stays manageable with over-the-counter pain relievers. Many patients report that the relief from eliminating the infection outweighs any temporary soreness from the procedure itself. Avoiding hard foods for the first few days helps prevent complications.

Regular dental checkups become even more important after root canal treatment. While the tooth no longer has living nerve tissue, it can still develop problems, such as new decay around the crown margins or issues with the root structure. Most root canal treatments last for decades when properly maintained through good oral hygiene and routine dental care.

Patient reviews consistently show that modern root canal procedures cause much less discomfort than people expect. Advanced anesthetic techniques and improved equipment have transformed what used to be a dreaded dental experience into a routine treatment that effectively saves natural teeth.

Contact Us

We’re here to help you achieve a healthy, confident smile. Whether you’re scheduling your first visit or have questions about our services, our friendly team is here to assist you.

Our Office: 1820 Coit Rd #145, Plano, TX 75075

Call Us: (972) 964-8989

Email Us: staff@wpvdental.com

Office Hours

  • Monday: 8:00 am – 5:00 pm
  • Tuesday: 8:00 am – 2:00 pm
  • Wednesday: 8:00 am – 5:00 pm
  • Thursday: 9:00 am – 6:00 pm
  • Friday: Closed
  • Saturday: 8:00 am – 1:00 pm
  • Sunday: Closed

Schedule your appointment easily through our online booking system.


Related Topics: